Ingredients
-
For the Crust:
-
1 cup gluten-free rolled oats (use your favorite brand)
-
1/4 cup unsweetened cocoa powder
-
1/4 cup maple syrup (or preferred sweetener)
-
1 tablespoon raw chia seeds
-
For the Filling:
-
1 ripe avocado (about 1 small to medium size)
-
1/2 cup frozen wild blueberries
-
1/2 cup pitted dates (Medjool or softened)
-
1/4 teaspoon vanilla extract
-
1/2 teaspoon sea salt flakes
-
1/4 cup unsweetened cocoa powder
-
1/4 cup nut butter (cashew, almond, peanut, etc.)
-
1 tablespoon maple syrup
-
Optional Garnish:
-
Sliced fresh fruit (such as strawberries, raspberries, kiwi, mango, papaya, etc.)
-
Shredded coconut flakes
-
Toasted coconut flakes
-
Chocolate shavings
-
Sprinkles
Directions
Subtitle: Created with Love using Whole Foods Plant-based Ingredients, Gluten-free, Oil-free, Refined Sugar-free, Soy-free, Spicy, Kid-friendly and Zero Waste!
Ingredients:
For the Crust:
– 1 cup gluten-free rolled oats (use your favorite brand)
– 1/4 cup unsweetened cocoa powder
– 1/4 cup maple syrup (or preferred sweetener)
– 1 tablespoon raw chia seeds
For the Filling:
– 1 ripe avocado (about 1 small to medium size)
– 1/2 cup frozen wild blueberries
– 1/2 cup pitted dates (Medjool or softened)
– 1/4 teaspoon vanilla extract
– 1/2 teaspoon sea salt flakes
– 1/4 cup unsweetened cocoa powder
– 1/4 cup nut butter (cashew, almond, peanut, etc.)
– 1 tablespoon maple syrup
Optional Garnish:
– Sliced fresh fruit (such as strawberries, raspberries, kiwi, mango, papaya, etc.)
– Shredded coconut flakes
– Toasted coconut flakes
– Chocolate shavings
– Sprinkles
Instructions:
Direction 1: Prepare the crust
1. Add all crust ingredients to a food processor and process until combined and forms a dough-like consistency. If needed, add a few more tablespoons of water or arrowroot powder for desired texture.
2. Transfer the mixture into a bowl and use a spoon to form a well in the center.
3. Press the mixture evenly into the bottom and up the sides of four mini tart tins (or one large tart tin). You can also press the mixture into a parchment paper-lined pie dish.
4. Place the prepared pan(s) in the freezer while you prepare the filling.
Direction 2: Make the filling
1. Add all filling ingredients except for the nut butter to a high-speed blender (such as Vitamix or Blendtec) and process until smooth and creamy. Scrape down the sides if necessary.
2. Add the nut butter and pulse until mostly incorporated. Do not overblend! The goal is to maintain some texture from the nuts.
3. Pour the filling into the prepared crust(s) and spread evenly. Use a back of a spoon to gently press any air bubbles down.
4. Cover and place the filled tins in the freezer for about 15-20 minutes, or until firm enough to handle.
Direction 3: Serve
1. Remove the tart(s) from the freezer and let them sit at room temperature for a few minutes before serving. This will help the chocolate shell set and become easier to remove.
2. Using a sharp knife, carefully cut around the edges of the tart(s) to loosen them. Then, invert onto a plate or serving dish. The tart should release easily. If not, run the knife under warm water briefly and try again.
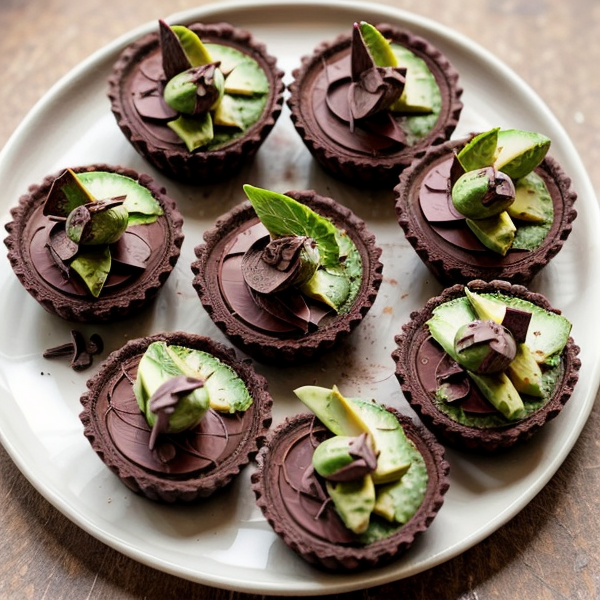
3. Top each tart with your desired garnish and enjoy immediately! Store leftovers in an airtight container in the refrigerator for up to 3 days.
Note: For a vegan version, simply substitute the nut butter with another non-dairy nut butter such as cashew butter.
Steps
|
1
Done
|
Add all crust ingredients to a food processor and process until combined and forms a dough-like consistency. If needed, add a few more tablespoons of water or arrowroot powder for desired texture. |
|
2
Done
|
Transfer the mixture into a bowl and use a spoon to form a well in the center. |
|
3
Done
|
Press the mixture evenly into the bottom and up the sides of four mini tart tins (or one large tart tin). You can also press the mixture into a parchment paper-lined pie dish. |
|
4
Done
|
Place the prepared pan(s) in the freezer while you prepare the filling. Direction 2: Make the filling |
|
5
Done
|
Add all filling ingredients except for the nut butter to a high-speed blender (such as Vitamix or Blendtec) and process until smooth and creamy. Scrape down the sides if necessary. |
|
6
Done
|
Add the nut butter and pulse until mostly incorporated. Do not overblend! The goal is to maintain some texture from the nuts. |
|
7
Done
|
Pour the filling into the prepared crust(s) and spread evenly. Use a back of a spoon to gently press any air bubbles down. |
|
8
Done
|
Cover and place the filled tins in the freezer for about 15-20 minutes, or until firm enough to handle. Direction 3: Serve |
|
9
Done
|
Remove the tart(s) from the freezer and let them sit at room temperature for a few minutes before serving. This will help the chocolate shell set and become easier to remove. |
|
10
Done
|
Using a sharp knife, carefully cut around the edges of the tart(s) to loosen them. Then, invert onto a plate or serving dish. The tart should release easily. If not, run the knife under warm water briefly and try again. |
|
11
Done
|
Top each tart with your desired garnish and enjoy immediately! Store leftovers in an airtight container in the refrigerator for up to 3 days. Note: For a vegan version, simply substitute the nut butter with another non-dairy nut butter such as cashew butter. |

